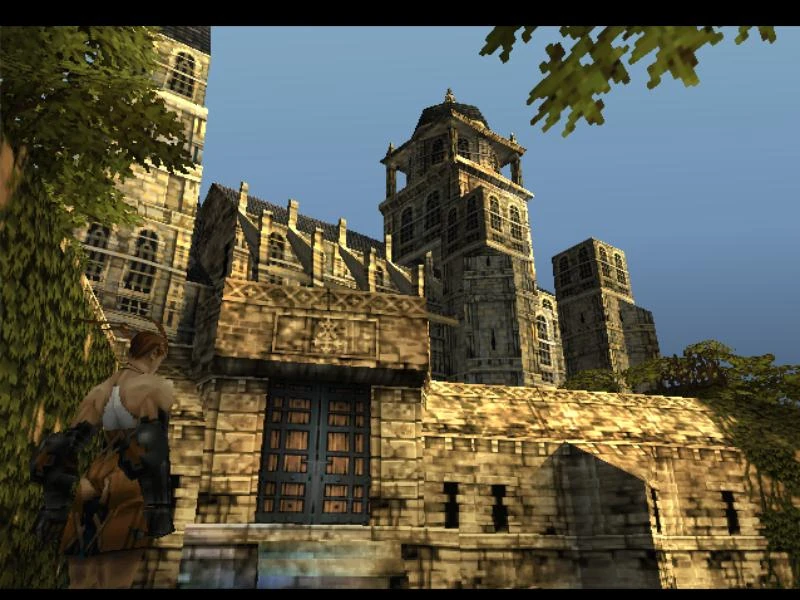
The Great Cathedral can be seen after ascending on the last Cloudstone out of the Temple of Kiltia, but the path to there leads back through previously unexplored parts of Town Center East
- Previous Area: Limestone Quarry
- Next Area: Great Cathedral via Plateia Lumitar
- Silver Key obtained (areas in Undercity West, among others, now accessible)
Cutscene after exiting Tunnel of the Heartless and before entering the first room:
Guildenstern uses his unique power, that like Ashley's has grown stronger in Leá Monde; mind manipulating compulsion. Hardin is at first only incredulous that a follower of Iocus has the powers of the Dark, but when Guildenstern scoffs at this as underestimating the powers of the Cardinal, and continues his interrogation, Hardin succumbs, and sees a vision Guildenstern has made for him: Sydney returned, asking odd questions. His senses dulled, Hardin believes the questions to be a test. The answers mean more to Guildenstern, with his years of training in the lore of the occult, and he realizes at once that the Key that he is seeking, Sydney had only pretended to seek, for it had been on Sydney's back the whole time. Carved onto the backs of followers of Kiltia and Müllenkamp who would not bend to the demands of the Inquisition of Iocus, they knew it as the Blood-Sin[1]
Another cutscene begins after exiting Those who Fear the Light for Chamber of Reason.
The Dark Coast[]
Exit to Tunnel of the Heartless in Limestone Quarry
- Magic Circle. Save and Teleport
- Container
- Trap Clear and Heal Square Traps
No enemies
Hall of Prayer[]
Obligatory battle:
Last Crusader. Accessory: Agria's Balm (the player probably has seen this before, if they have fought many Quicksilvers), Grimoire Purifier, Alchemist's Reagent
Replaced by :
- Water Elemental. No armor. Spells: Aqua Blast (each arm). Avalanche Lv 1, Recharge 25 MP (head). Grimoire Avalanche 8/255
- Nightstalker. No armor. Spells: Solid Shock, Frost Fusion
- HAGANE Double Blade 16/25. Bhuj Grip, Braveheart, Morlock Jet. Vera Tonic 32/255
Those who Drink the Dark[]
Bit of a jump, then a Cube Puzzle to reach The Chapel of Meschaunce door, where the Silver Key that opens the door to The Resentful Ones is located.
Cube Puzzle:
Jump across and head North. Destroy the northernmost of the pair of cubes right next to each other on the middle level, so that you can stand where it is now. Turn South and push the remaining cube into the hole. Another cube can now be pushed West on top of it, while remaining at the same height. Now that moved cube is free to move South; push it until it clears the wall to the west, and Ashley can go around to the west of it and push it to the eastern wall. Push the remaining box to the eastern wall also. Destroy the western of the two boxes on the lower level. Push the remaining box as far East as the boxes on the top level. Notice that the doorway is in a sort of a V shape; there is no room for Ashley to push boxes at the sides of the door, but in the center, there is. One by one, push the upper level boxes over the bridge made by the lower box, to where Ashley can stand next to the door and push them West one square. Now that they have gotten a free square South of them, push them north. Push the first one five spaces, and the second one four spaces North. The very top box must now be pushed North and down a level. However, there is still free space to its West, for it to be pushed East onto the 'Switchyard' (rail lines that diverge from the main line to allow trains to change lines or pass each other on a single track) that has been created below. Because of this, it can move ahead the space needed for it to continue its journey north and become Ashley's step up to the Chapel of Meschaunce doorway.
The Chapel of Meschaunce[]
- Minotaur Lord. Boss version drops Titan's Ring, Elixir of Queens, three Alchemist's Reagents, automatically. Cannot drop Hand of Light
- Minotaur Lord that replaces it drops the Hand of Light at 8/255 (Runkaysle, Titan Malachite), and Sorceror's Reagant 32/255
- Chest, unlocked: "Frost Maiden" HAGANE Mjolnir + Runkasyle grip. Sonic Bullet grip Ghost Hound Accessory. Two Cure Potions, Two Mana Potions. Silver Key
The Resentful Ones[]
No enemies
Two Cube Puzzles
South Cube Puzzle:
Push the northernmost digit cube North two squares; West one square. Push the other digit cube one square North, East, then South. Push the glowing sliding cube East, then North, then East. Push a crate onto the glowing cube, and climb up.
East Cube Puzzle:
Two ways to do this:
One is a little faster, uses the blue cubes, and leaves a jump with a degree of difficulty; the other just uses the "Switching Yard" technique used in Those who Drink the Dark, of moving the top box from the digit cube to the lower box, and then moving the free cube into its next position to be a base again, and gets the box up flush against the wall.
Solution One:
Push the digit cube West. Push the box onto it. Move the lower box around the digit cube; first North then East. Repeat this process of switching the top box from one to the other and moving the now-free lower cubes around each other, until Ashley can jump up.
Solution Two
Push the digit cube North one, then West three. Slide the southernmost glowing cube West. Roll the digit cube North twice. Slide the remaining eastern glowing cube West. Slide the northernmost glowing cube South. Move the upper box north two, and jump up.
Semi-bug here, probably known and possibly intended, as the walls that should block the view to the other halves of the room become transparent as the camera point of view draws near, and each other half is visible from either side.
The door to Those who Fear the Light is locked with the Silver Key
Those who Fear the Light[]
Air Elemental, Gremlin, HP-Low-triggered Gremlin, HP-High-triggered Gremlin,
- Trigger: Ashley's HP < 150
- Trigger: Ashley's HP > 150
- Trigger: Ashley's HP > 204
Trigger 1: Ashley's HP < 150 :
- Gremlin: Stun Cloud, Heal, Silence (head)
| HAGANE Plate Glove 8 / 255 |
HAGANE Vambrace 8 / 255 |
No helm | HAGANE Segmentata 8 / 255 |
IRON Poleyn 8 / 255 |
HAGANE Spiked Shield 16 / 255, Manabreaker. DAMASCUS Tabar 16 / 255, Heavy Grip, Orion. Cure Tonic 32 / 255
- Gremlin: Poison Mist, Heal, Silence (head)
| HAGANE Vambrace 8 / 255 |
BRONZE Plate Glove 8 / 255 |
HAGANE Sallet 8 / 255 |
BRONZE Segmentata 8 / 255 |
HAGANE Fusskampf 8 / 255 |
HAGANE Lug Crossbow 16 / 255 , Falarica Bolt, Haeralis . Mana Tonic 32 / 255
Trigger 2: Ashley's HP > 150 :
- Gremlin: Herakles, Prostasia, Silence
| No armor | HAGANE Rondanche 8 / 255 |
HAGANE Basinet 8 / 255 |
IRON Brigandine 8 / 255 |
IRON Jambeau 8 / 255 |
HAGANE Spiked Shield 16 / 255 , Manabreaker . HAGANE Khora 16 / 255 , Side Ring, Trinity , Braveheart . Acolyte's Nostrum 32 / 255
- Gremlin: Leadbones, Tarnish, Silence
| HAGANE Vambrace 8 / 255 |
No armor | HAGANE Barbut 8 / 255 |
HAGANE Scale Armor 8 / 255 |
HAGANE Poleyn 8 / 255 |
HAGANE Tower Shield 16 / 255, Nightkiller. DAMASCUS Shotel 16 / 255 , Side Ring, Iocus , Braveheart. Acolyte's Nostrum 32 / 255
Trigger 3: Ashley's HP > 204 :
- Gust Air Elemental: Each arm: Lightning Bolt. Head: Thunderburst Lv 1, Recharge 25 MP. Grimoire Foudre 8 / 255
Chamber of Reason[]

Rosencrantz' power over the Dark is denied him so close to the center of its hold on and in Leá Monde
Cutscene: <previously>Rosencrantz hunts Sydney down to the Temple of Kiltia; he interrupts Sydney's dream of better days, in the Manor Chapel with his father, Duke Bardorba to demand of him his choice of successor. Sydney names Ashley, refusing Rosencrantz the power; he calls Rosencrantz an "iniquitous knave", and predicts that Rosencrantz would misuse the Dark. Rosencrantz strikes Sydney, and he falls back<end previous>
Rosencrantz fells Ashley to the floor, and crows with disdain for the sorry state of the Key-bearer and his choice of heir to the power of Leá Monde, and demands to be named successor. When Sydney repeats his refusal, Rosencrantz hacks off his right arm, only to find that Sydney's arms are not merely clad in metal, but made of them; his limbs were a price of his power. Sydney's metal arm Sydney awakens a guardian statue to kill Rosencrantz, and offer Ashley yet another challenge[2]
Obligatory battle:
Congratulations! screen and Stat Reel:
Kali
- Right arm (no way of telling which; best guess is, top to bottom): Caeser's Thrust, Heaven's Tear
- Left arm (again, which) : Tyrant's Mace, Raven Eye
- Head : Degenerate, Tarnish
Exit to City Center[]
Stairs out to a Cloudstone out to Eastern Town Center (the Evil Training dummy in Gharmes Walk and The House Gilgette, the door on the latch next to the Junction Point Workshop)
No enemies
See Also[]
External Links[]
- Vagrant Story part 15(of 21) The Key Video of Cutscenes either in or just before this area
- Vagrant Story part 16(of 21) Last of Rosencrantz Video of Cutscenes either in or just after this area
- Vagrant Story Maps